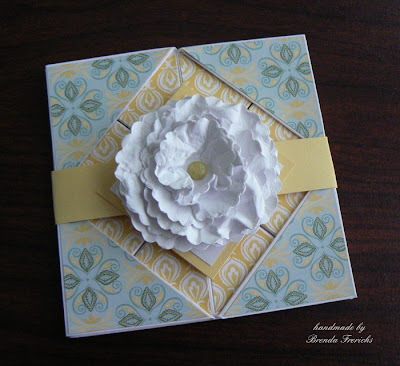
This card was left very simple to accent the flower. I pulled colors from Color Dare # 31 at Color My Heart. (It's a fun weekly color challenge site using CTMH products.)
As I see it, you can either use the Cricut and cut two different sizes of scallop circles OR you can use two scallop circle punches. I have the punches handy, so that is what I used here. (Note: The larger one is CTMH and the smaller one is from Hobby Lobby and perfectly matches in number of scallops.)
You will need six of the larger size and three of the smaller size.
Stack one size of scallops and use a piercing tool to punch an intentionally OFF CENTER hole through all the circles. (I'm off at least 1/8" but closer to 1/4" here.)
Repeat with the other size of scallops--again making sure to intentionally offset the hole through all the circles.
(At this point, you may want to use a sponge dauber to add some color around the edges of each circle. I neglected to do this in the picture because I was in a bit of a hurry and forgot. Oops. :-)
Next, dampen both sides of all the scallops with water or stamp cleaner. I prefer stamp cleaner. It leaves a lovely scent and stiffens the flower slightly when it dries.
You will need one brad for this project. Begin with the three smaller circles. Add each circle to the brad so that they do not stack evenly on each other. Rotate each circle, as needed, to unevenly stack them to a desired fullness/look.
Continue with the larger scallops, constantly rotating as needed to fill in visual holes and achieve an overall symetrical look. Close the back of the brad when finished.
Layer by layer scrunch up each circle up and into the center where the brad is. Go ahead and get and really crinkle the petals here. It'll give it a more natural look. (And, if you notice your circles seem a little dry, feel welcome to spray a little more to dampen the paper.)
Why is it better to work with dampened paper? The paper crinkles more evenly and softly--resulting in a more natural flower.
Here's a picture of one done all in white for a Napkin Fold Card. To see directions on how to make this remarkably simple card, click here.
Thanks for stopping by!
Blessings,
Brenda


3 comments:
What an awesome some tutorial! I am so gonna try this. I never saw this where you off set from the center. I love Shabby Chic so this will be perfect. TFS the card is gorgeous btw. Remind me of a tile design.
I love the habby bday at the top what a nice simple sweet card!
Beautiful! Do you recall the SIZE of the smaller punch? Thank you for your time and talent!
Post a Comment