To make the punched border for the oval shape, I used a Martha Stewart punch. Here's how I made it fit an oval shape:
Use your favorite border punch and punch along the edge of your cardstock. (Please note: the larger the shape you wish to border, the longer the piece of carstock will need to be. For this card I actually joined two pieces together to get the length I needed.)
Here I trimmed the border to leave a 1/8" strip of solid cardstock.
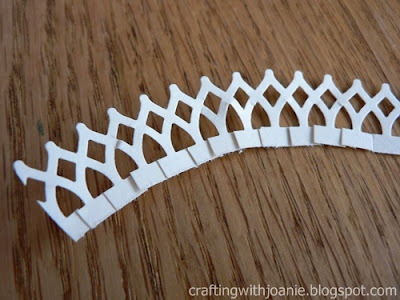
Here I snipped the solid strip about ever 1/4" (or in between each arch). This will help the border curve.
Overlap the snipped pieces, gently pinching the border to set it as you go. It's starting to take shape. (Please note: when mounting it to the back of your shape, put down your adhesive and then apply your border as you crimp/curve it the way you want it to go.) It holds it right there. (I used Terrifically Tacky Tape to secure my border.)
I mounted the oval on 3-D Foam Tape and added ribbon , pearl opaques, and feathers (for a touch of whimsy).
What do you think? Have you ever thought to use feathers on a card?
Thanks for stopping by. Sending smiles, Joanie


9 comments:
Thanks for posting this great idea. I am a CTMH consultant in your age group and I love it. It has been such a great thing to do in retirement. I enjoy the social aspect of it.
Check my blog: http://scrapandstamp4ever.blogspot.com/
Fabulous use of a border punch! Thank you for sharing. I like your style and will be sure to check out your art regularly.
Thank you for sharing...I needed to know how to curve a straight punch - whoda' thunk!
Love this technique. I hadn't seen this done before. Great Job!
Joanie, I LOVE your cards! They are very beautiful, classy and YOU are brilliant!
WOW! You're brilliant!!!!! Lovely cards, beautiful work, talented eyes for making it look so beautiful!
I love the border! Great card!
I can't thank you enough for this awesome tutorial! WOW I never imagined what I could do with that border punch! Thanks for sharing your talent!
Great idea, thanks for sharing.
Post a Comment