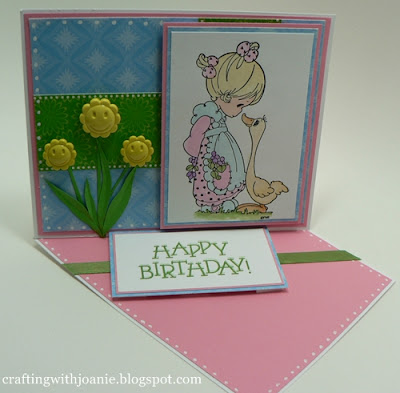
This is a Twisted Easel Card. Here is a picture of it standing up. These make lovely gifts as they display very well.
In my opinion, the little Precious Moments stamp makes any project cuter--they are all so sweet. I used the water brush to color in the image and added some little smiley faced buttons for flowers, (shanks cut off).
Directions for this size Twisted Easel Card are:
Blog post invasion! Brenda here to share a few of my own photos. (I just couldn't resist!) :-)
Begin with two pieces of cardstock. The first is 4 1/4" square. The second is 4 1/4" x 9 1/2".
Set the 4 1/4" square aside for a minute. (That will be the "front" of the card.)
NOTE: The 4 1/4" square can actually be a rectangle, so long as two parallel sides stay at 4 1/4" in length. (I noticed my mom's is 4 1/4" x 5 1/2", so I thought I'd better explain.) :-)
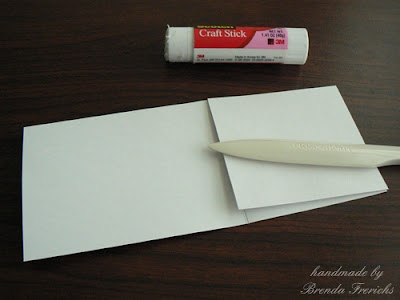
Insert the second piece of cardstock into the paper trimmer at score at 4". Use the picture above to help you.
Rotate the bottom right corner in your paper trimmer so that the corner and it's opposite line up in the cutting track. Score a second line from corner to corner.
Remove from the paper trimmer. Fold the paper at the last score line you made so it looks like the picture above. (NOTE: If you've done this part correctly, the triangle will not completely cover the one below.)
At this time, retrieve that 4 1/4" square of cardstock you set aside and glue it to the top triangle so that the finished look resembles the one in the picture above. Make sure you only add glue to the top of the triangle.
(Remember, the square will not perfectly line up with the rectangle underneath. Do not be alarmed by the look.) :-)
Now it's time to fold up along the second score line. This tilts the "front" of your card upward to created that "twisted easel" look. (By the way, the view you see is actually the back side----but that's intentional. I wanted you to see how the whole thing is supposed to turn out.) :-)
Rotate the entire card 180 degrees on your table top to view it from the front.
Simply pull the "easel" part forward to collapse it completely. Now you see how it will look as it is pulled from the envelope. This will help you determine how to decorate it.
So, what are you waiting for? :-) Start decorating! :-)
And, Thanks, Mom, for letting me crash your post........again. (I love you!) :-) -Brenda
Thank you for coming by to visit today....happy stamping.....smiles.....Joanie


No comments:
Post a Comment